Create content
With InTeach you will be able to create microlearning capsules that are being structured in courses. These capsules form a microlearning grain of 3 to 5 minutes. They are themselves composed of cards, which are as many educational activities, which you will define.

Create your first course
To create a course, you must be an administrator or author.
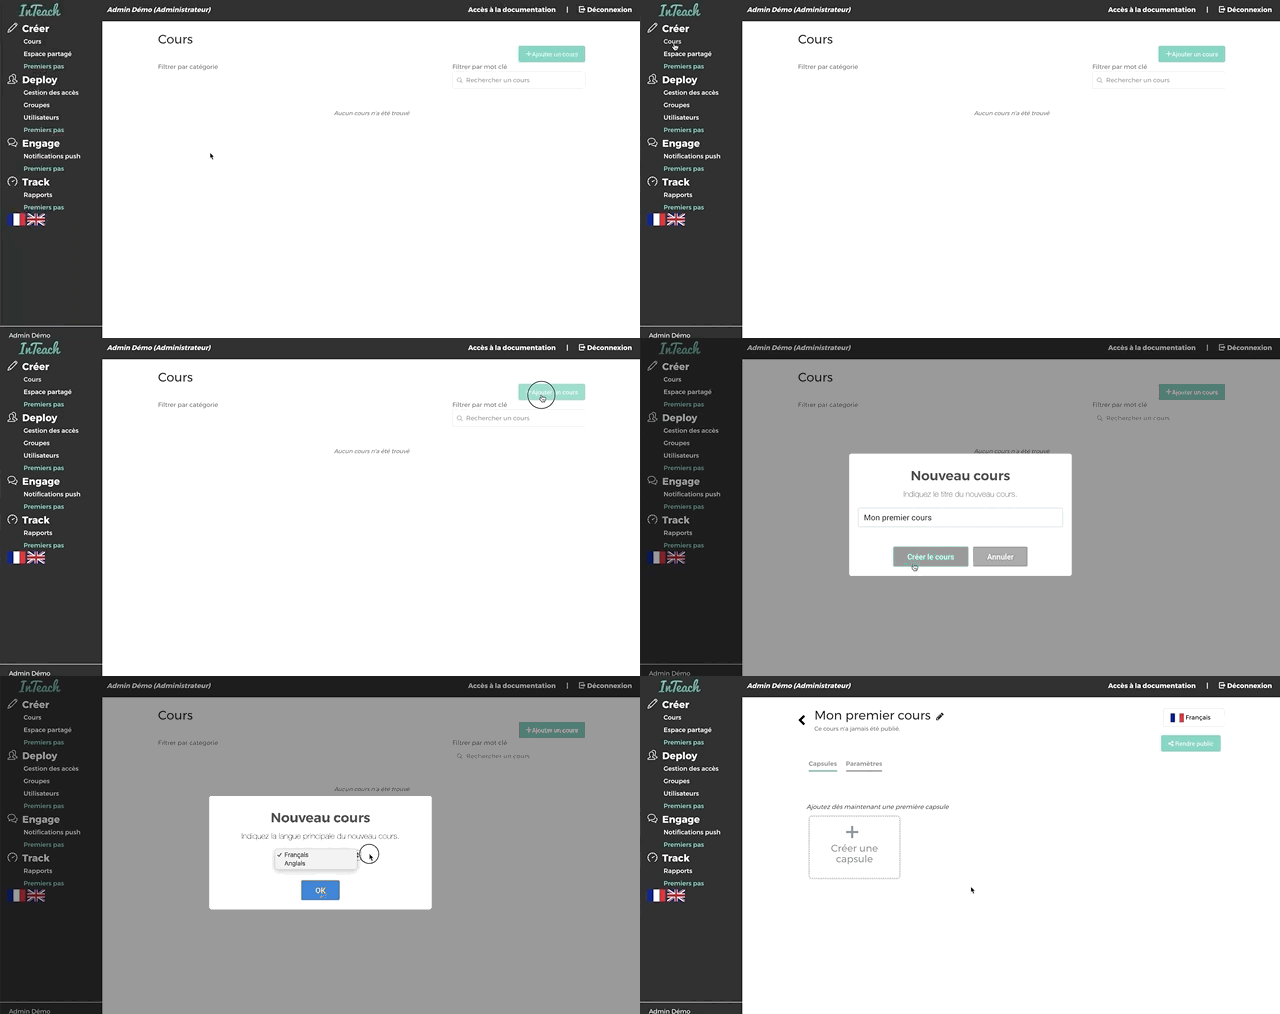
To do this, go to the Courses tab under Create. On this screen, you will find all your courses. Only you, as the author of these courses, can see them. They are private. We will then see how to share them if necessary.
To create your first course, click on Add a course. A pop-up window asks you to enter the title of this course. You can change it later. Click on Create Course.
A new window asks you for the default language of the course. To learn more about InTeach’s multilingual features, go to: Translate InTeach content. Indicate the language in which you will write your course. Be careful, it is not possible to modify it later! Click on Ok, your course is created.
Congratulations, you have created your first course! Now let’s see how to add capsules and evaluations, and then how to set them up.
Create your first capsule
Your course will be divided into capsules. Create your first capsule by clicking on Create a capsule. A window then gives you the choice between a Capsule, which allows you to transmit knowledge to your learners, and an Evaluation, whose role is to test knowledge. We will see in more detail below the difference between a capsule and an evaluation. For now, choose Capsule and click on Create Capsule.
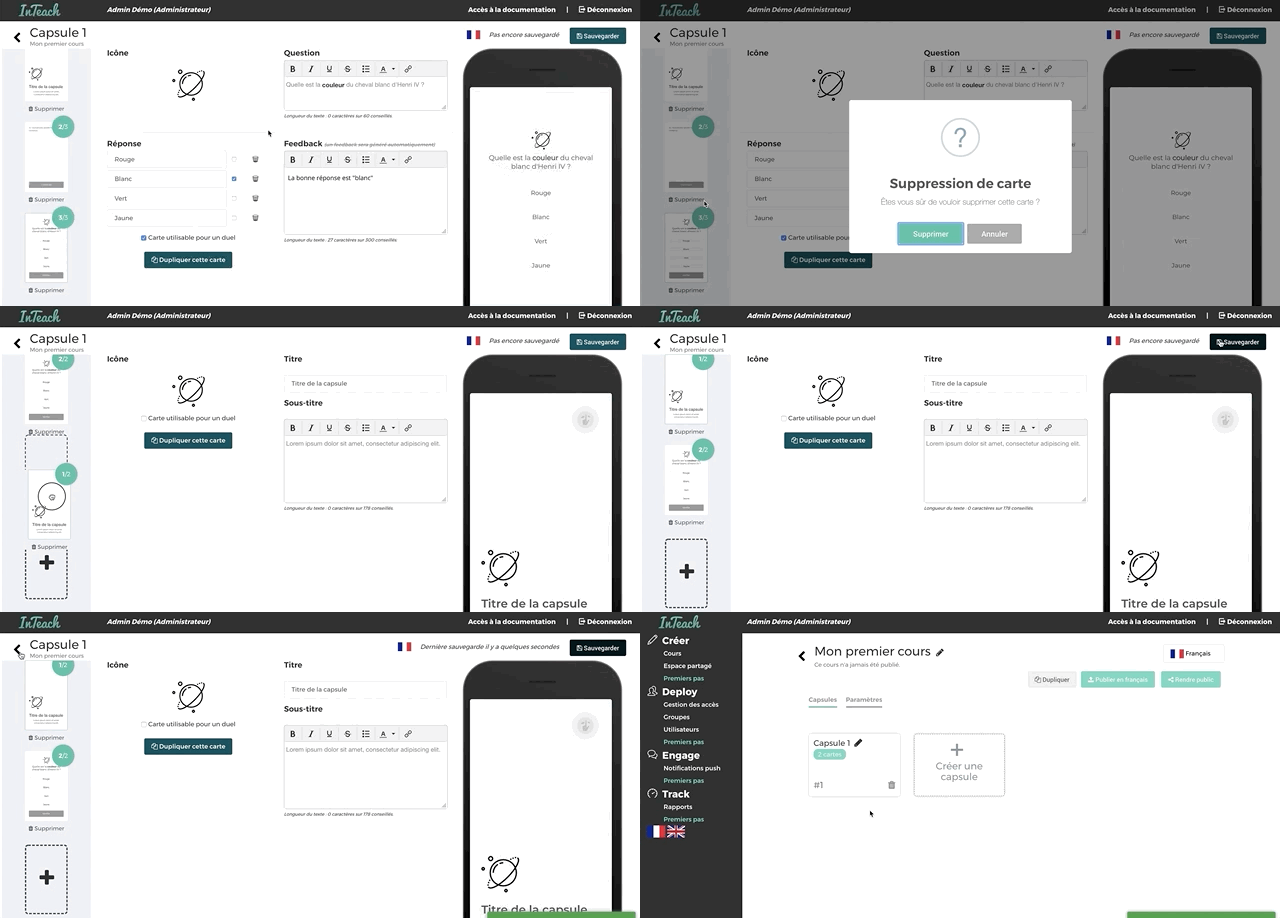
The capsule is created with a default title. To modify it, click on the title, modify it, then click on check or outside the field to confirm. It’s saved!
To access the capsule editor, click in the middle of the capsule.
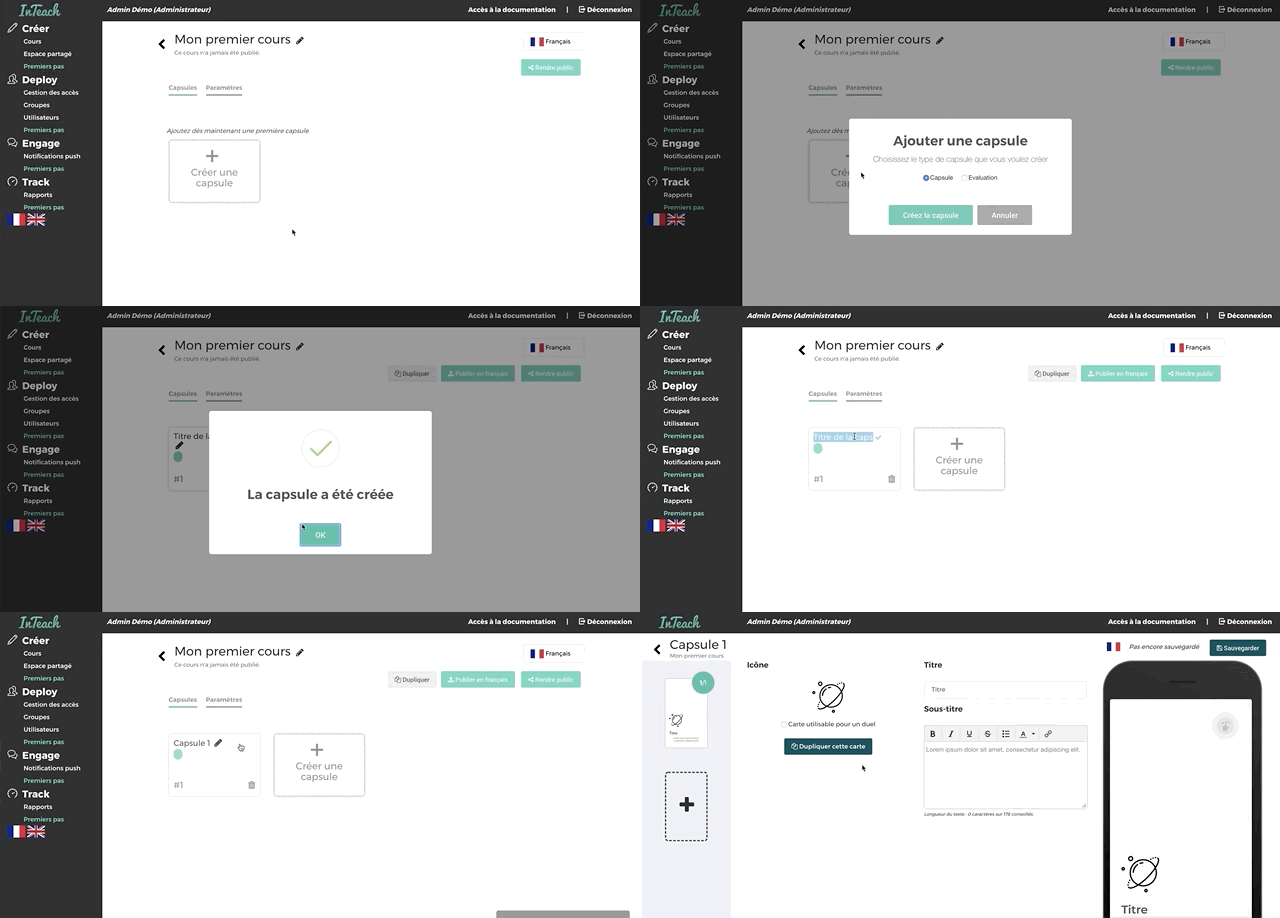
_Welcome to the editor!* A _Title_ card appears by default. On the left, you see the cards (only one for the moment) composing the frame of your capsule. In the middle is the editor of the active card. And on the right, a real-time preview of this card in an iPhone.
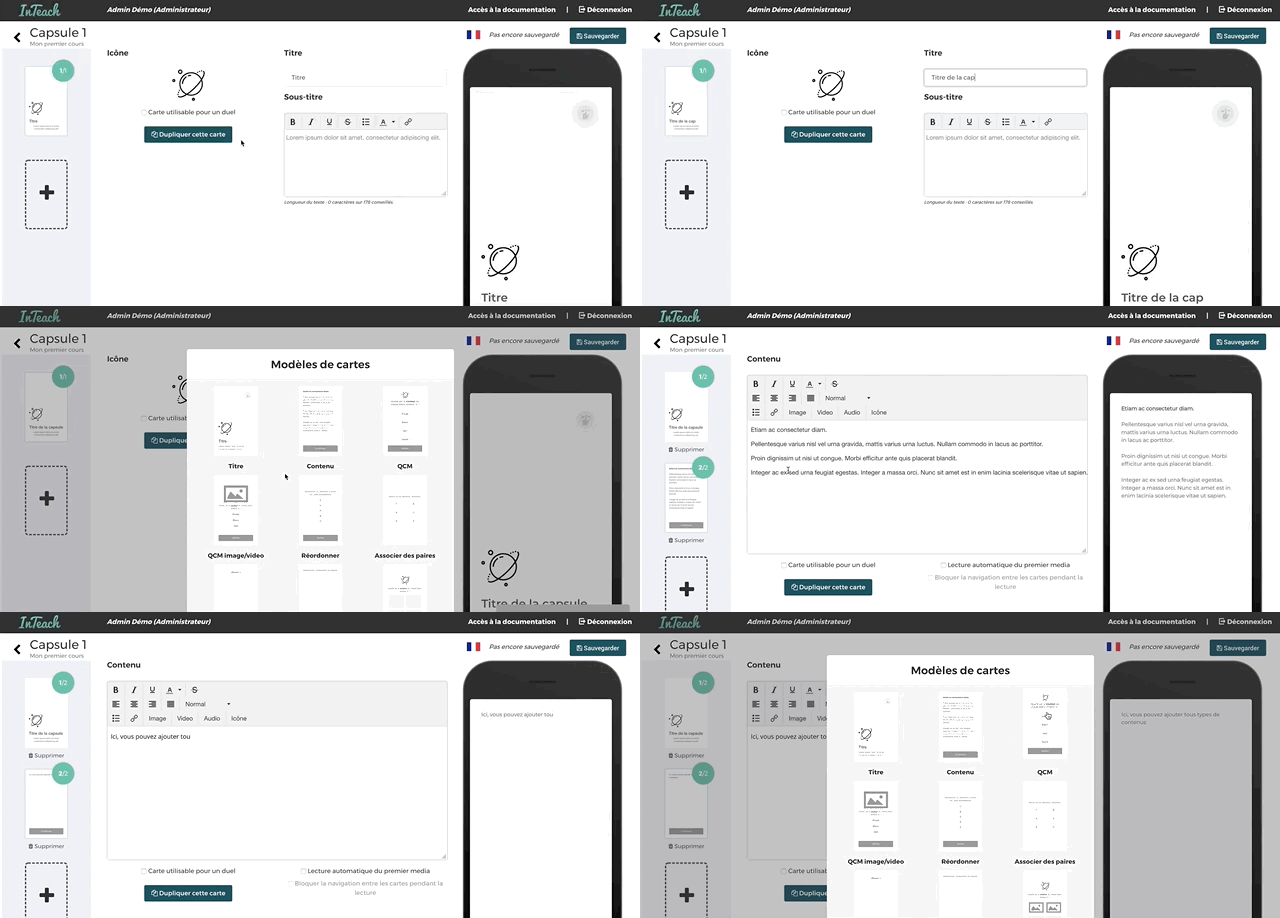
Modify the Title card, then add a new card by clicking on the + dotted card in the frame on the left. You then have the choice between different card models which will be further described later in this article. For the moment, choose a Content card.
You can now modify the content of this card in the editor at the center. As we will see later, this card enables you to add all types of content, formatted text, images, videos, audio,…
Let’s add a new card, click again on the + card, then this time choose the QCM card.
The feedback field enables you to set the explanation given to the learner once he or she has answered the question. You will find this field in all types of activities.
To delete a card, simply click on Delete, below a card and to reorganize them, you can drag and drop them.
Once you are satisfied with your capsule, click on Save to save your changes. Then click on the return icon at the top left of the screen to return to the list of capsules.
Capsule and evaluation
A capsule can be composed of content cards (text, video, image… and educational activities (quizzes, texts with blank spaces…). It is a means of transmitting knowledge. The points that the learner earns by doing the activities of a capsule are experience points. The purpose of the pedagogical activities of a capsule is not to test knowledge but to initiate and allow memorization.
An evaluation, on the other hand, contains a set of questions that will determine the learner’s level of proficiency. At the end of an evaluation, a badge can be unlocked based on a configurable score.
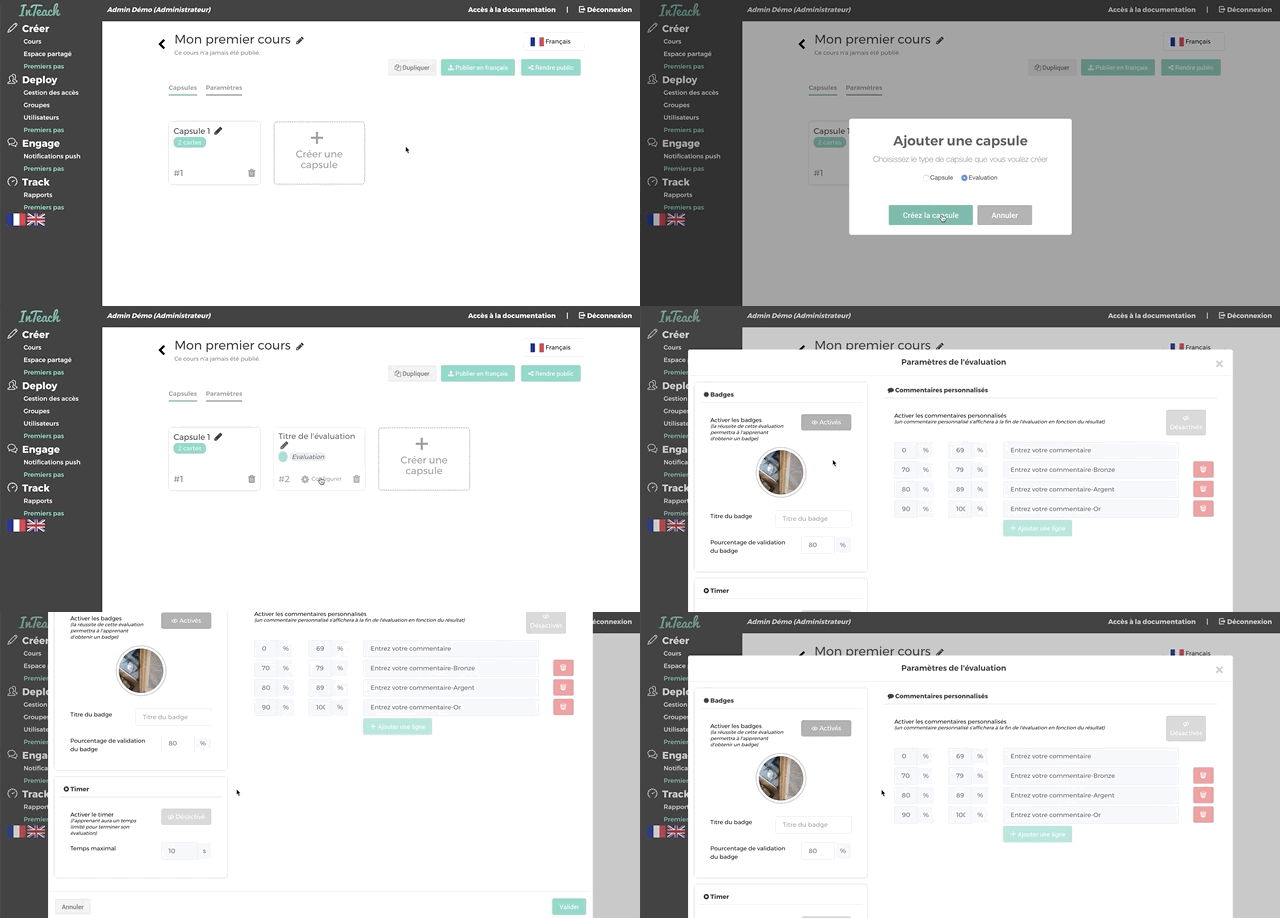
To create an evaluation, click on Create a capsule in the course. When choosing the type of capsule, choose evaluation. You can set up an evaluation by clicking on “Configure”.
In the configuration window of an evaluation, you can set up:
- A badge. It will appear as the cover image of the course (we will see how to configure it in the next part). You can indicate the percentage of correct answers needed to receive it as well as its title.
- Personalized comments. You can customize an encouragement message at the end of the evaluation based on the learner’s result.
- A timer. You can set a maximum time frame during which the evaluation can be carried out
Set up a course
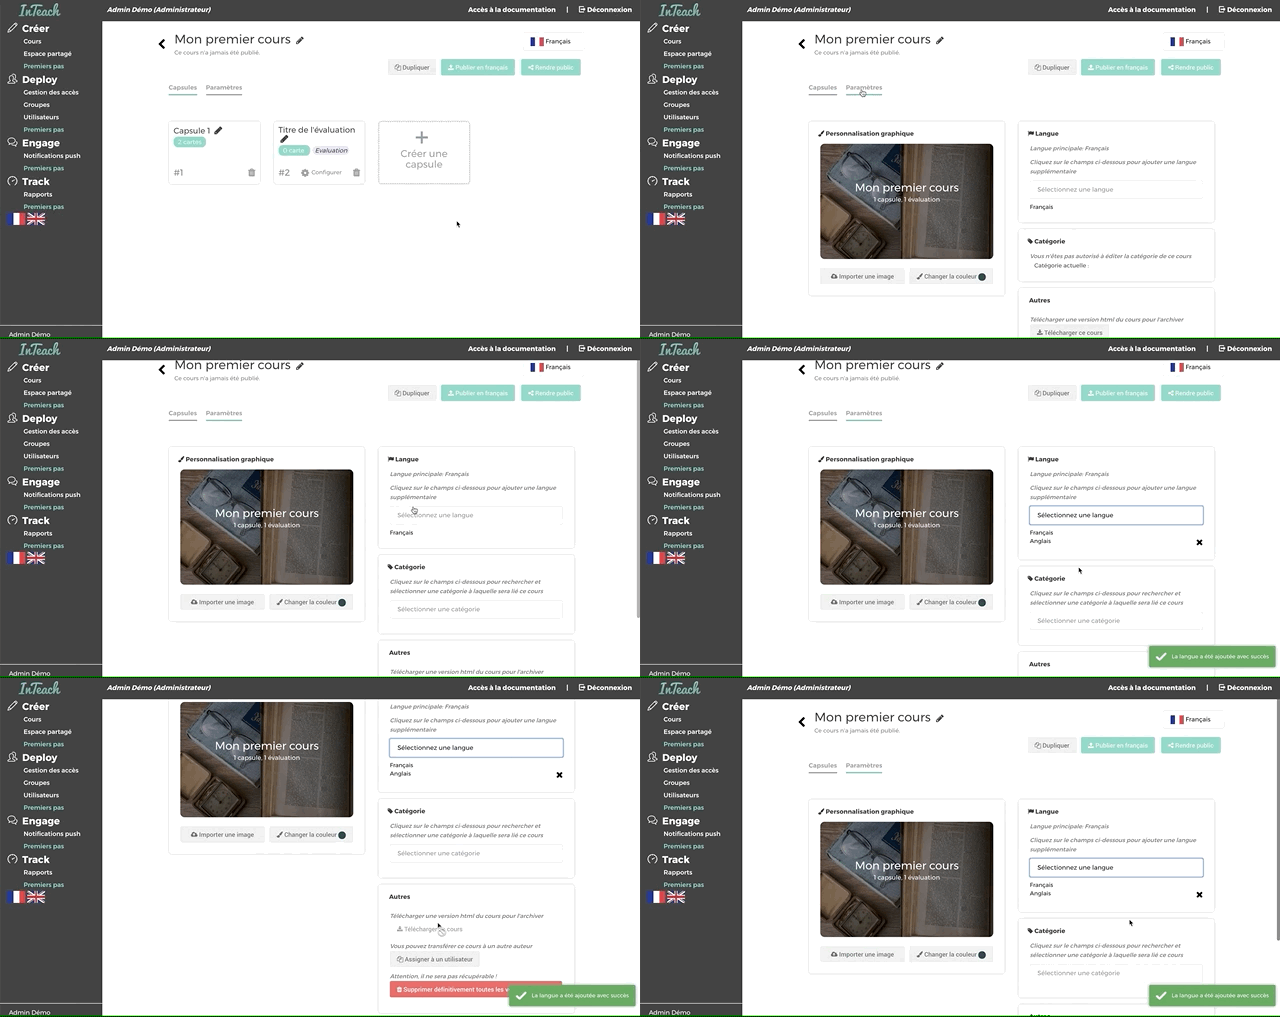
Customize the universe of your course by clicking on the Settings tab on a course screen. In this tab you can set up:
- The cover image of the course,
- The color of the course (color of the buttons and visual elements when viewing the course),
- The languages of the course.
This is also where you can delete a course, reassign it to another user or download it in html format to keep track of it.
